Sunday, August 4, 2013

Installing the stiff leg derrick

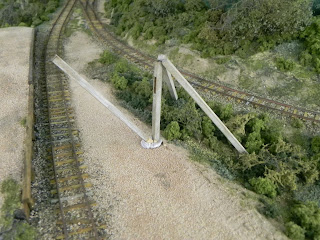
I've had a bit of time out in the shed today, so I was able to finally put the Derrick crane in it's location. I have had a bit of fun finishing this one off using oingo boingo wire and some nicely laser cut pulley wheels. I had to glue the 'wire' to the pulley wheels before mounting the wheels on the crane. It would have been near impossible to get it right after mounting the pulleys onto the crane. It was fiddly but ended up ok. 
 The crane can rotate on the central post. By using the stretchy wire I'm able to attach the crane to the timber load, and it is taught. I'm also able to move the crane around to the line and can attach it to the load for a change in scene.
I've tried a new brand of paint on the rust on this model, and it is an air brush ready paint made by Vallego, called their model air paints. They come in a drip dispensing bottle, already thinned to airbrush. They have some great colours, and are great to work with. Worth a look if you can find them, I got mine from a local wargammers shop. 
 The mech was fiddly to construct, but I'm happy with it now it's all together. The original kit that I purchased is really almost non existent, the timber and a few of the white metal parts, but over half have been left behind. Interesting the company who puts out the kit were no help with better instructions, or quality white metal castings. If I was building another one I'd do it from photos and put together a kit of parts myself. Once you get a handle on just how they go together they really aren't that difficult to construct, although threading the 'wire' was my 'favourite' part!
Anyway a quick post tonight, have a good week,
Oorroo!
Geoff.

Tuesday, July 30, 2013

Working on my stiff leg derrick crane.

The current modelling project has been the completion of my derrick crane. I was a little stumped at just how to construct the mechanism, and as usual my solution was to put it in the 'too hard' basket. I searched the net and came up with a few helpful ideas, from a site called Shorpy historical photos. 
The instructions with this kit were horrible, and the white metal castings had enough flash on them to keep a streaker happy! So with gears from Peter Boorman ( thanks again Peter!) and a couple from Vector cut I had a go at the mech throwing away the original one. What you see below is the just painted item, ready for mounting, rusting and weathering.  Ignore the square timber under it, that was just used to hold the item while painting it. There's still a bit to go, but I'm looking forward to finishing this one off, now the procrastination is over with.
It will be mounted in the goods siding, beside the loading bank. I'll post a photo when it's in place. a quick post today, just to let you know I'm still here.
Have a great week,
Oorroo!
Geoff.

Thursday, July 4, 2013

NSW Convention 30

I had an opportunity to head to the convention this year as Z and I had some time away, just the two of us. Gary and Marcus were great in helping get things sorted. The day had me set up having a chat to people about landscape techniques I'd tried on Splitters.

The sheer number of attendees was huge, and the sessions available were many and varied. I attended two on the day, Sandy Hollow and modelling backyards. I thoroughly enjoyed both. The backyard scene is something I could really relate to as I firmly believe the scene sets the 'time' of the layout. I do have a few photos found on the net that will help when I get to that stage, and it was pleasing to find others wanting to set the scene in their layouts as well.


I met several modellers that I'd known by name only before through the blogs, great to finally catch up Gary and Linton. The level of involvement of modellers is great to see with many wanting to spend time with all of us set up for demos.

A great day, think I'll have to go next year,
Geoff.

Friday, May 31, 2013

'Twas the Night before T'ba

'Twas the night before Toowoomba when all through the shed,
not a creature was stirring, not even a Ted.
The tapes on the ground all aligned with care,
In the hope that the layouts would soon be there.

The modellers were nestled all snug in their beds,
while visions of diesels and steamers chuff along in their heads,
And Ted in his PJ's and Smithy in his,
settled down for a moment, Bill off in a tizz.

When out in the Showgrounds there arose such a clatter,
It was Geoffrey reversing again, and smashed into the ....


Bugger! I got so close, see you up there fella's, looking forward to a great weekend


Sunday, May 26, 2013

G1b Goods Shed

Well if there was an award for slow progress then I think they may as well inscribe my name on the trophy for a few years yet! I've been at work on the G1b goods shed, but I am pretty happy with the results. 

I decided to build the sliding  doors from two layers of strip wood to give the different sides of the doors as on the real Mcoys. I used Kappler timber, great stuff and I can get the scale size I need. They ended up only a couple of scale inches thick.  I've also messed about with the metal door hangers building them out of styrene sheet cut to shape, and paper as well just to see what looks better. As it has turned out after much procrastination (surprising really!) I think that you won't be able to see the tops of the doors anyway, will the detail police catch me out on this one I wonder?

 These two photos show the Goods Shed at Manilla, showing the inside and outside of the doors. They are a different design to the plan I have, but did help with the general arrangement of the door and the 'hanging' method used. This building has since been burnt down, glad I took heaps of photos!
The Canowindra Goods Shed, for the purpose of seeing the exterior view of the door and the colouring of the bumper rails on the building and wooden trim colour.
It is interesting to note the supports to the roof on the outside of the building. On the plan I used they are shown to be on every roof truss, however the two sheds above only have them on every second. What is it they say about a photograph?

So back to the model... here it is so far. I've wanted to model the interior as well after going to all the trouble of doing the wood framing. In this shot you can see the enamel wire I used to hook up the LED. 
Here the roof is going on, my only fear now is that something on the inside will come loose and it will become some sort of strange modellers baby rattle!
Once the roof was on it didn't take long to site the shed on the layout. Yep another light in this one, with some shed repairs in progress.
 Alright what's changed in these two shots? Yep, the stairs went on, nearly forgot. Things are starting to come together on this side of the layout.

Well just a quick update, have a great week, and we might see you in Toowoomba this weekend, That's the 1st and 2nd of June, we'll be the ones in the naughty corner! 
Oorroo,
Geoff.

Saturday, May 18, 2013

Goods shed update

 Look Out! The detail police are here! He's 'bout ten feet tall and out of scale! 
 The Goods shed has made it's way onto the layout...finally. Out with all the bits to mess up the scene. I've made a start but there's a fair bit to go.
Afternoon sun just came through the wall of the shed, so I thought it worthy of a photo. It is a different look altogether. Just a quick post to get in before Craig!
Oorroo!
Geoff.

Friday, May 17, 2013

Post & wire fencing

At the Brisbane May Show this year I purchased some more of 'Modeller's Warehouse' Oingo boingo wire. It comes in a couple of different thicknesses and I thought ideal for a wire fence beside the station Masters home. 
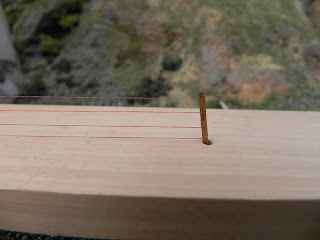
I stained some timber, allowed it to dry then drilled some .4mm holes in it . To allow me to easily thread the 'wire' I drilled some holes in a piece of scrap timber to hold the fence posts in place while the fun part started. The needle I used was simply a piece of magnet wire that I folded back on itself to thread through the holes. Remember to attach the oingo boingo wire to the post so that you don't pull it completely through. Once it is all threaded up, then secure the other end.
Then plant your posts in some predrilled holes, beaut! Just gotta plant some grass around the post's then should be done.
Here's some photos, I like the look, really fine, and very elastic in case you catch the wire.
Have a good week, Oorroo!
Geoff.


Thursday, April 25, 2013

A bit more lighting

Quite by accident the other day I came across a light for sale on EBay. The seller has listed the dimensions as 85cm high and 100cm out from the wall, with the shade having a diameter of 35cm.
Perfect data along with some great photos. So if like me you were building some these dimensions should help, or you could buy it!

Geoff.


Sunday, April 21, 2013

Station and Yard Lights

The Station at Evans Gap had little lighting, so I thought it would be a bit of fun to add some to the layout. I've been looking through books for a decent shot. Finding one clear enough has been fun, as the locos have been in focus, or the station building, but not everything around them.
I found a couple that have a decent enough shot to build a 'close enough' model. I'll list the bits I've used and a bit of a rundown of how.

The bits I've used are easy to come by,
brass etch ladder style
.5mm internal diameter brass tube
.4mm fishing line
.1x.8x150mm brass ministrip
about 3mm dowel
tichy train group light fixtures
All pictured here I hope.


I hollowed out the light fixture and drilled out the hole for the brass tube to .7mm, the same as the outside of the brass tube.

 The two blocks were for ensuring all the lights I build are the same shape, hence the outline.  the blocks have razor saw cuts to hold the ladder style and the brass tube for soldering. I had to use a blob of blue tac as well, my favourite jig accessory.

The actual light is fiddly rather than complex, especially the twisted brass bar. There was a fair bit of trial and error before I was happy with the shape. The 'S' shaped brass tube was bent around my pin vise. I did feed the fishing line into the tube before bending it so that the tube would hold its shape. Why fishing line? Well can I tell you wire in the tube then bent, that wire ain't coming out! Fishing line pulls out, and I also threaded the line in again when I wanted to paint the light as it is definitely the easy way to hold something so fine.

I used the ladder etch as it was much easier to drill out to the diameter of the inside of the brass tube, than using plain brass bar. The holes in the middle of the light I plan to use as mounting holes with fine wire soldered into them. 

I soldered the light together, but weakened and used some glue! For the light shade only Ian!
After all as the Grand Master says...Glue is for Girls!


So there you go. A nights work for the first one, a little faster for the rest. Did I forget something? Ask away!

Have a good week!
Oorroo!
Geoff.


Tuesday, February 19, 2013

Derrick Crane for goods yard

The yard area is small at Evans' Gap, so the locals had to be smart about how they set it up for use. Beside the goods shed there is a second crane, and the first one constructed is similar to the photo taken above. Unfortunately the original crane has been decommissioned, so the model on SSC is the only 'proof' that a crane like this one actually existed on the site.


At the 2012 TMTEX I was lucky enough to find a nice model of a derrick crane at Xmas Every Day. I'd seen photos of this type of crane at a few different locations and I thought it perfect for something different at SSC. During the course of the show I was chatting with Daz and Peter about what I'd found, quite a popular crane it seems. Thanks to Peter Boorman for supplying me with a fret that will be used to model all the gears.


The crane is basically basswood with white metal detail parts. The fret that Peter gave me will provide a much finer gearbox, and should help detail the crane nicely. Ages ago when I built a buffer stop out of basswood I stained the timber first then painted it, and then sanded and stressed the paint so that some of the timber was bare. I've done the same for the timber work here, the key is to allow the stain to completely cure befor adding the paint, then let the paint cure j as well. I state cure as dry is a completely different state, as there is still moisture in the paint for days. I use acrylics and I've found in the humid atmosphere up here that it can be 5-7 days before the paint has cured enough to sand it without it coming off in clumps as you sand it to strip off the peeling off paint to expose the timber beneath.


The model is from Alexander Scale Models, nice laser cut timber, and white metal detail parts, that do require a little clean up. The only issue with the kit is the lack of detail in associating the parts with where they go on the model. The line drawing only identifies the part name, but does not clearly show the part so you know what and where each part goes. The company that produces the kit tells me that the instructions contained are all there is, most helpful.
Here's a photo of the laid out parts that might make it easier for those who want to build one.


I sprayed all the whitemetal with undercoat, then a nice rust colour on top. The pulleys in the kit are a bit coarse, well actually a bit more than coarse. So into the parts box I dove and came up with some pulleys from AndIan Models, nice. As I said earlier, I have a fret from Peter Boorman that will make up a nice gearbox. I just need to modify how this will all work to fit together.

Now that all the timber is weathered, I'll take a moment to mock up the crane on SSC.
 Here it is opposite the loading bank, which still gives room for the crane to swing around and unload from road vehicles also.
 The two stiff legs are in the scrub making setting them up a little easier.
The room in the lower part of this last shot will be the unloading area for road vehicles. 

So for now I might stop there so I can get a little more done, tick another item off the list. One...there are so many!

Anyway, have a good week,
Oorroo!
Geoff.


Thursday, February 14, 2013

TMTEX 2013, Can you believe it?

Another year of modelling since the TMTEX 2012 has passed me by. The dates for Toowoomba this year are the 1st and 2nd of June. My modelling calendar begins and ends with Toowoomba. I set milestones, plans, joblists, deadlines, all by the coming of Toowoomba. I also state after each show, that I'll be better organised in ticking off those lists next year...well some things just ain't gonna happen! I am reminded that none of us are able to spend even half of the time we plan to on our hobby, yep H knows this fact well.

Each year before I head up the range, I try and encourage others to go as well. This is a weekend for the modellers as well as the general public. We showcase our hobby, and have some fun ourselves. It is enjoyable to catch up with others who are enjoying our hobby as much as us, and to show the public what we are trying to do.

I do wonder what people think as they view all the displays on show. Do they compare to their efforts? Are they inspired to have a go? Are they intimidated by what people have done? Do they learn something more than they knew before entering? What was their reason for attending in the first place?
Inquisitive fellow aren't I? Well I suppose without asking questions we don't learn more. I am aware of the fact that some people may never ask a single question whilst looking about the hall. The T'ba club always asks for us to be available for the public to speak with. We have a great time sitting out front, having a chat. There are some great stories/chats to be had each year, what will this year bring?


 Last year the weather was a little damp to say the least. Let's hope for a dryer weekend this year. The hall was pretty full of displays last year, let's hope for the same this year. We'll be there again with SSC,  and some comfy chairs to sit on out front. So definitely come and have a chat, stand about, wave your arms above your head, make a scene to be seen! Above all have a ball, and make some contacts, ask some questions. Looking forward to TMTEX 2013, see you there!
 PS. Some shots from last year, to remind me of what I've done (or not) since then.


Oorroo! Geoff.