Monday, September 8, 2014

Carriage shed progress

 I've been working away on this project for a while now. I can say that is starting to take shape finally. The timber really is enjoyable to work with. If you haven't read before it is bass wood that I've purchased from Gwydir Valley models, cut up in scale sizes ready to use, great stuff. In my last post I'd built up the uprights on a jig. There is another jig I made up that held the uprights on their sides so that I could add the top plate that links the side together, then the diagonal bracing to each side. Once all that had dried it was to the roof with the battens being fixed in place. I should mention that a couple of mates came over for a modelling night a few weeks back, and I actually managed to get most of the battens glued down, between drinks! Quite the challenge.
The corro' iron was next, but I did need to trim it up to the right sized sheet. All of them for this project were a scale 6ft long. The paint on the sheet is the grey primer made by Tamiya. I like this one as it is very fine and can be put on very lightly allowing some of the shine to show through. 

Here it is with some of the sheeting attached. I use the white glue made by simply glues called rapi-bond, it is fast drying and holds really well. I think the differing shades of grey are worth making up a couple of batches of iron with slightly different amounts of paint on them.
Whilst the glue dried I used the time to put on the first layer of weathering. A very thinned down rust coloured wash has been used, acrylic. Acrylic? I hear you say? Love'em, thin down easily with isocol, and you can even take some off if you've been too heavy handed if you are careful. There is a bit more done on this but I will save that for the finished product post. Not long now I hope.

That's it for now,
have a great week,
Oorroo!
Geoff.

Tuesday, August 12, 2014

Carriage shed pt1

The workbench has been calling me of late, hence the new project. The Carriage shed is about 80 scale feet long. The overall size of Splitters has meant that the shed is about half the size of the scale drawings I have. The Data Sheets from Greg Edwards show two different designs and I've chosen the skillion roof one to model. I made a simple jig to make up the uprights for this new project. I've used basswood that has been prestained with india ink to give it an aged look. I have made up the frames with a gap at the top of each upright column so that the top plate can be added later to tie all of them together. 

This next photo shows the uprights in the second jig. The jig will allow me to add the bracing to each 'bay', of course it will be lying down to do this.

This last photo gives you an idea of what is next to come. I will be putting the third jig on the back of this, just to hold the 'flimsy' frames in the correct spacing so that the roof batons can be added as well. So there you go, just a short post today. 

Have a great week, Oorroo!
Geoff.

Sunday, May 25, 2014

TMTEX 2014

Well everyone, it's here again, the Toowoomba model Train Exhibition is on next weekend. The show has a generous number of layouts all in the one huge shed. Yes it is located in the Toowoomba Show grounds and is well worth the visit. Have a look at the plan, whoa! So many things to check out!

If you have the time, I'm sure you will not be disappointed. there are many reasons from a modellers perspective to head up the range, the new ideas you find, the friendships that are rekindled, the purchases from the many varied stores that come, the weather (just beaut!) or even the enthusiasm of the general public that come along.

In the words of Mollie 'do yourselves a favour!'
See you there! Oorroo!
Geoff.

Tuesday, May 6, 2014

too Shay!

So here's the shay with a bit of green thrown on it. I've decided to put it where I originally planned at the end of the 'other' side of the layout. It will be at the end of a disused siding, below the mill. There abouts is the plan, but it's not glued down yet! 

 Excuse the photography, it looks a little better up close in front of you. Anyway a quick post tonight, off to the train club. Been a while I might need to wear my name badge so people know who I am. 
Have a great week! Oorroo!
Geoff.

Monday, March 24, 2014

A rusty shay

Hi All, 
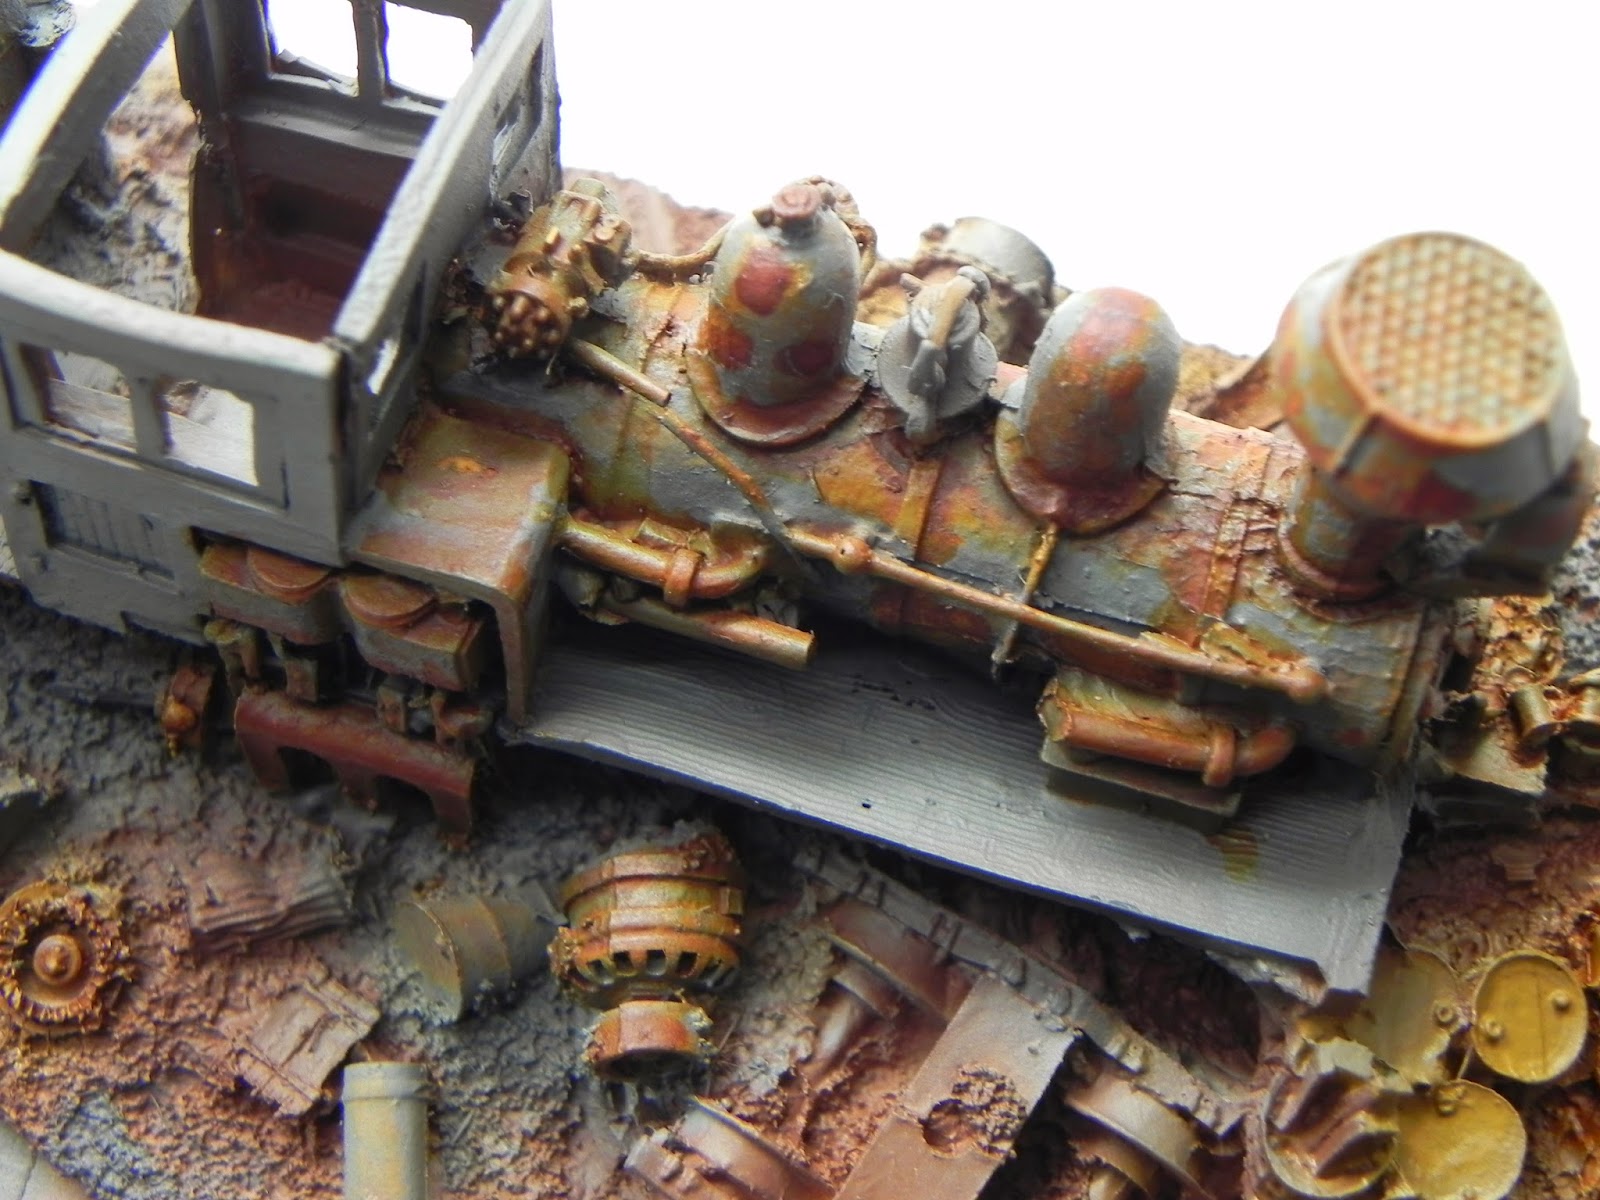
I thought I'd post some progress shots of the weathering of the Shay for the end of the layout. The main reason for the post is to share of the products that I used to get it done. There is along way to go, the most obvious is the cab and running boards. They are timber and are only in the base colour. I have been wanting to try one of the chipping products that are on the market so that is the focus.
 The first shot shows the side of the loco. I applied the base rust colour and let it dry. Then once cured applied the chipping coat and let it air dry for about half an hour. Then straight on with the grey top coat.
 As soon as it is dry looking it was out with a wet paint brush. You basically apply the water and the top layer of paint breaks up. I have found out a couple of things worth sharing. The first is that you need to be sparing with water as it all happens pretty quickly. The second is that you can use alcohol instead of water. It does dissolve the paint rather than flake it off. You do need to wipe the brush though as you don't want a milky wash over the top of your rust.

The third is that you can let that top coat cure completely before taking it off with the isocol. The side of the boiler has been done in the final way, and I think it looks ok. It does slow down the chipping process which I like.
 
 This last shot is a group of the products I'm using. The model air is the base colour, then the chipping, then a top coat of acrylic (not shown) The vallejo wash on the right has been used in the above photos after the chipping stage. It is easy to use and there are a couple of colours available in their range. The Rustall will be used along with the pulverised clay that is in their pack, great stuff.

There is along way to go, but I thought it worth sharing these products with you. The next steps will be to further weather the metal, then the wood, then work on the base it is buried in. It feels good to post again,
Oorroo!
Geoff.