Wednesday, June 15, 2016

Constructing a new scene for Splitters, part 1

Hi Everyone,
I've been beavering away on this project for a while now. There is a corner of the layout that has just had basic scenery on it for far too long. My plan has always been to create a busy corner of the layout with a few opportunities for some buildings.

There will be some facilities for locomotives in the area, a loco shed and coal stage for starters. Along with  some non railway related structures for added interest. It is these structures I plan to construct first.
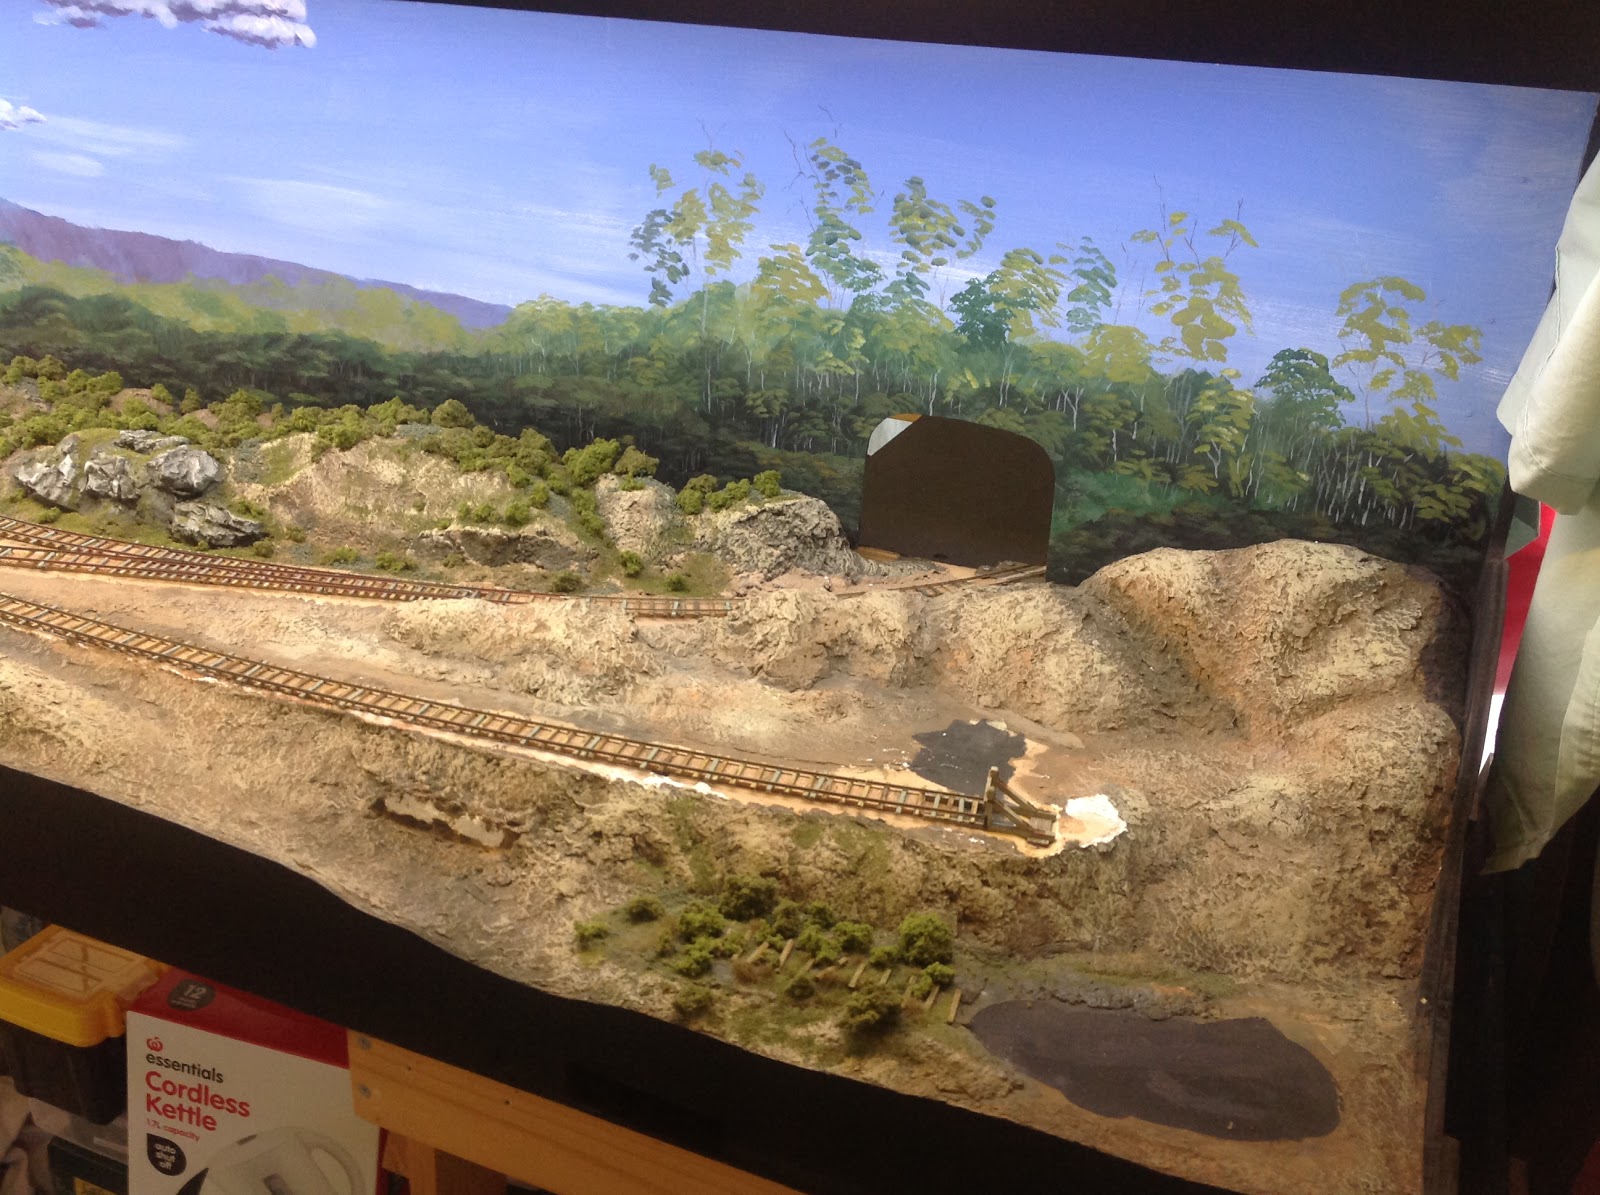
 This first photo shows the part of the layout that I plan to change. There isn't a lot of room to play with but it will be enough for my plan. The area closest to the front of the layout is where the coal stage and locomotive shed will be located. The area between the siding and where the line disappears into the backdrop will be for non NSWGR buildings, freelance style.
 The first structure is a small office styled building. It is styrene with a corrugated iron roof. A quick build after cutting up a kit of parts, as you can see here. I use the citrolene glue, as I prefer smelling of oranges than superglue, and a t gives a little more time with a similar result.
The main building took just an hour or so, so it works in well to a mid week hour session in the shed. I've had a few one hour sessions, and working with a plan in mind it is surprising just what you can get through. I always try and pre plan a little bit, for example if I'm going to build using wood I try to have a 'kit' of wood already stained up ready to go.

Since I'm loading this on an iPad, that's all I can load for now. Any more photos and I can't scroll down to look at them or add text.

So keep an eye out for part 2!
Have a great week!
Oorroo!
Geoff.

Wednesday, January 6, 2016

Timber buffer stop

A little project I've been working on, a timber buffer stop. The construction of the timber parts are fairly easy. I used basswood of the correct dimensions according to the plan and glued it together.  The painting of the buffer stop did begin before the glue was applied as I did used a wood stain and brass brush to bring out the grain. I constructed the two sides first as you can see in then photo, then over painted with a weathered white colour. normally I attack the timber again with the brush once the paint has dried, and to finish a sand with fine wet n dry to thin down the paint. A quick wipe over with water on a sponge removes all the loose stuff, and lets you decide whether you need to sand some more.

 I tried using a slightly different technique when constructing the 'metal' strapping and bolt detail. A visit to the local war gaming store had me emerge with some new paint products. In simple terms the paint has some fine powder in it so that when it dries it creates a slightly rough texture. I used it as I thought that it would imitate the effect that rust has on unprotected metal. In the above photo you can see the lower strip of bolt detail that is a light brown colour, and the top row that is much darker. The darker one has a coat of the rust look paint applied. Once that has dried various rust coloured paints can be applied. 

The detail is then glued onto the metal stripping. The stripping is just heavy gauge paper that is undercoated, then painted with the rust surface paint, then a top coat of rust paint. Rusty water runs on the timber were just another lighter rust colour. So then you put all that together and get this...

The project on the 'Geoffrey Scale of Modelling time' has it as a couple of hours, well maybe four all up. I still need to glue on the metal buffers and build the scenery around it, but I think you get the idea.
Enjoy your week,
Oorroo!
Geoff.

Sunday, January 3, 2016

Laying some final track work

Hi All,
 and Happy New Year to you everyone. I passed a little milestone yesterday  with the completion of track laying on SSC. It has been an enjoyable Christmas break this year, and one that has us all thanking God for his blessings in this last year. A New Year and a fresh start, especially in the modelling world. 

In the first photo on the left is the siding that has just been layed. This side of the layout has not received too much loving, so now it is the focus of my attention. Well that's not entirely true. I have a short to do list that I'm working my way through. 
Things like, repairs to blown LED's that weren't wired up with a resistor (but run on 9volts and worked for a while), completion of the layout lighting on the short side, a movable light on the inside of the end for Locomotive/Rollingstock repairs, reworking of point blades with a new version of holding them down. The list goes on but you get the idea.
Before moving on too quickly I'd like to thank all those people that made our hobby so enjoyable to be a part of last year. I was lucky enough to be a part of the Toowoomba Show, the Inverell Show, the Branchline Modellers Forum, running sessions at Daz's, Anthony's, and Craig's, modelling nights, and Toosdy Niters, thank you one and all!

We lost a Mate this year with the passing of Mike. He was around when I first came back to the hobby as an adult, and we shared many hair raising car driving experiences, and heated discussions. He was always happy to share his knowledge, especially to those who jumped in and had a go. There was never any bull with Mike, may he rest in peace.

 So what's next? This year as far as the hobby goes, I plan to work through all my projects currently on the workbench, and vow not to start anymore. There you have it in writing! I suffer with the 'joy of starting something new' syndrome, fairly common I think, but this year, no more, it's all about completion, of projects, models, goals. 

A procrastination free modelling year.
 It's nice to be back at the keyboard, and modelling bench for 2016. I promise to be more regular posting this year.
Have a great week!
Oorroo!
Geoff.

Monday, December 29, 2014

Tree modelling again!

Ok I can't promise this will be the last post on trees, but I had a little time in the train room  (garage) today and managed to finish this tree. There is a little bit of trimming to go, but basically I'm there.
 This first one is just to show how I've covered the trunk so that it to doesn't get a layer of green over it.
 This next one is with the foliage attached. It is a product I've previously mentioned from a company in the UK called Treemendus. It is fixed to the branches with a matt adhesive or fixative spray.
 Here I've added the flocks. I really do prefer the fine ground turf that adheres to the fibres making it look like much finer branches. It is interesting to compare the colours in the foliage in the photo above and below. The difference is the colour of the light. My layout light in the second shot is a much more yellow light compared to the almost blue/white light in the first photo.
 There is still some trimming to be done, but you get the idea. Not bad for an hours work I thought.
That'll do for now, enjoy your week, Happy New Year!
Oorroo!
Geoff.

Sunday, December 28, 2014

Tree modelling

It has been some time since I did some work on the landscaping of Splitters. So I thought some time spent on creating some trees would be worthwhile. I've taken to using florist wire for the core of the larger trees. I used whatever wire i had, and if you look closely in the first photo you'll see some uncoated wire as well in a different gauge. I have found that the coated wire works better when adding the acrylic paste over the top. The uncoated wire does tend to rust through the paste as it dries. Not really an issue I suppose as I paint right over the lot anyway. I used a solid base of pine that makes the tree easier to handle as you work on it.                                                                                        

The second photo has a little more paste than the first and is ready for the undercoat to be applied. I like the tamiya undercoat, and remember it doesn't have to be thick to be effective, just enough for the top layer of paint to adhere to.               

This next photo is after applying a base amount of brown paints then an airbrush over the top to tone it down as I really felt it was a little overdone. I added a few highlights, a little dry brushing on the trunk. Then that gets us to the last photo.

I do tend to get a little carried away, less is more is my mantra. The base will have some flocks added between the roots when it is added to the layout. Next up is the foliage, the messy but quick part. That will have to do for today.      
Have a great week, 
Oorroo!
Geoff.