Tuesday, March 27, 2012

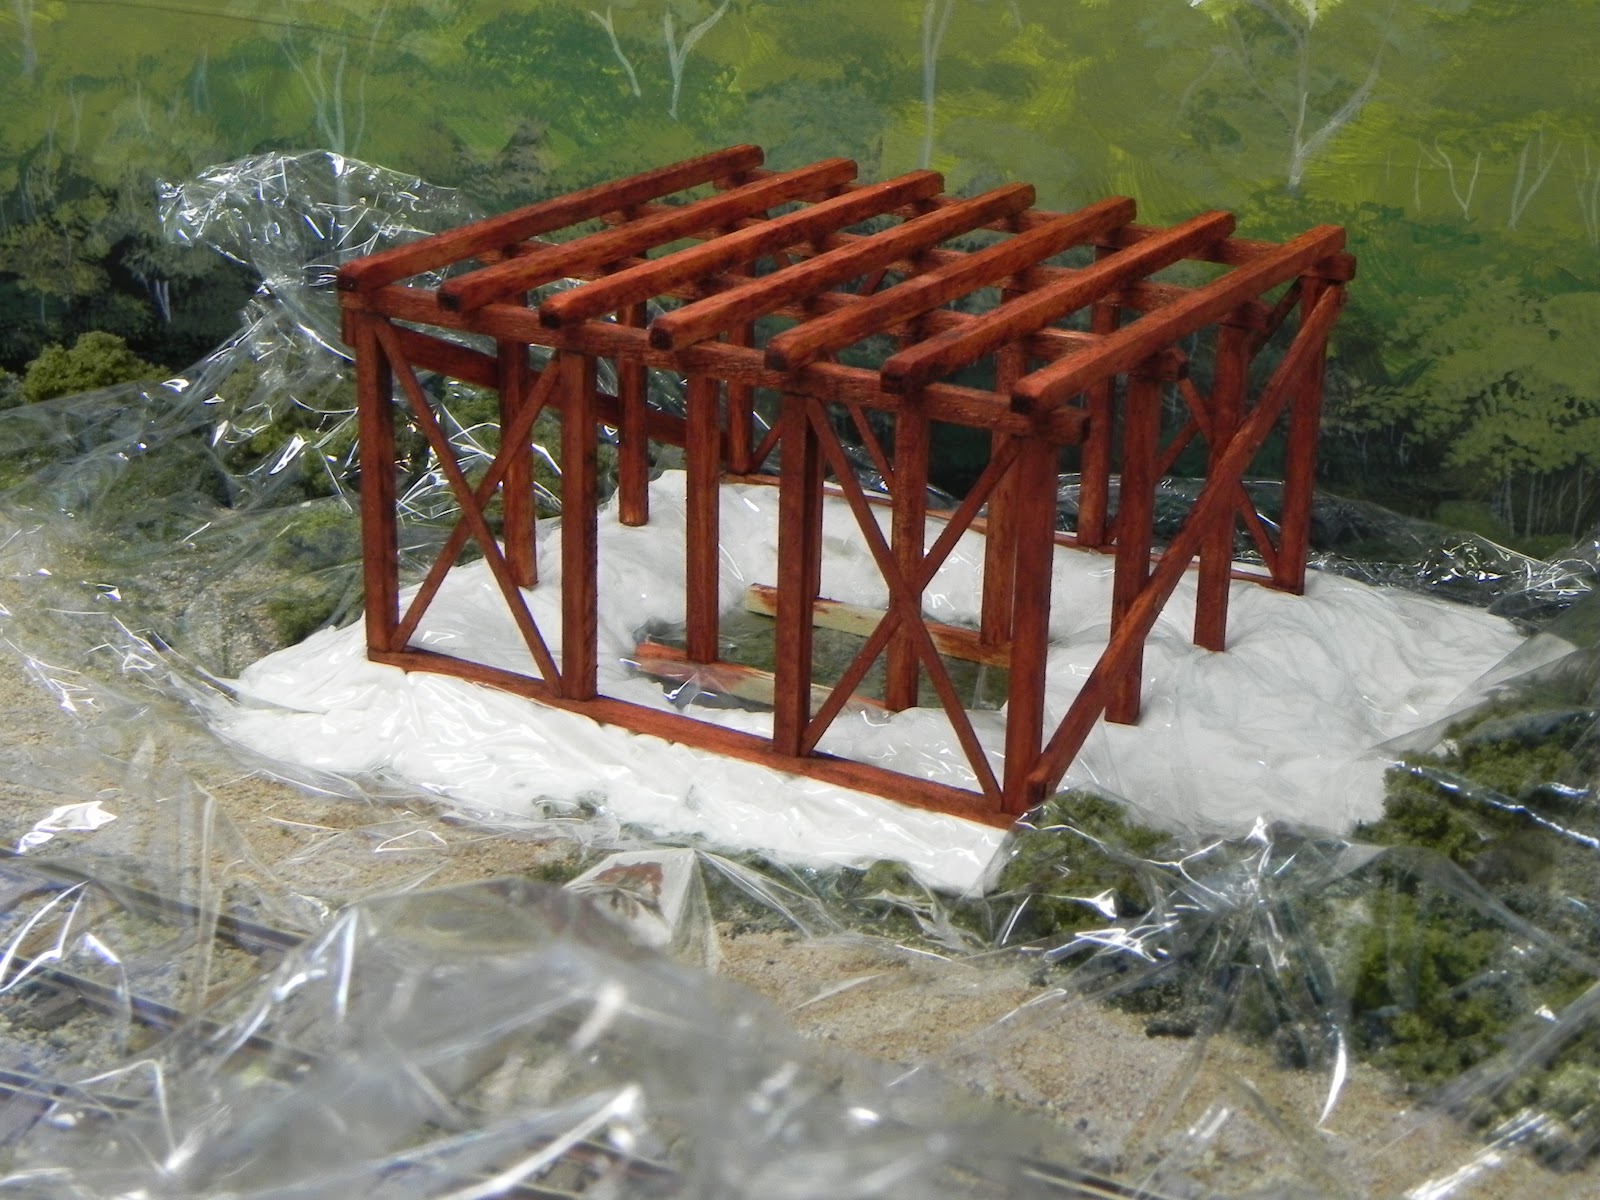
Mock up of Water Tank placement

Now that the ground work is nearly dry I placed the stand and its tank in place to see how they work. I've finished the cross bracing on the tank stand and added the bolt detail. Depending on how it settles into the ground area it might get a little more dirtying up, so we'll see how it goes once the 'snow' has been covered. 
The tank is one of the Casula ones, cut down and with some basic bracing put in place. The inside is still to be painted and 'water' added, and weathering/rusting of the exterior as well. The bracing does not go to the floor as it will be covered by the water.
 The next shot is just the ground without the stand to show you the finish up of the previous post showing the plastic removed.


Next it's out with the paint and dirt stuff, the fun part I think. There's also the piping and access ladder to put in place, but nearly there!

Oorroo!
Geoff. 

Sunday, March 25, 2012

Evans Gap Water Tank Stand

The water tank stand has almost reached the stage of locating it on the layout. I used basswood for the stand, 'jarrah' wood stain and some G/W dark flesh paint to colour it up. I was trying to get the 'red oxide' look about it as was used everywhere in NSW.

The first photo shows the basswood before the dark flesh paint was applied. The jarrah woodstain is used so that not so much paint needs to be applied. See the fantastic 'jig' I've used in this shot, think I should patent it!  

The second photo has the stand located on the layout. It also is a little redder as well with the extra paint now applied. You can probably see the cling wrap underneath it. I put down some sculptamold first shaped roughly to the shape required. Then I covered it with the cling wrap,  placed the stand on top pressing it down into the sculptamold so that it was shaped around the base of the stand. 

Off with the plastic and now it's time to wait for it to cure. Once it is I'll do the same in the centre, but removing the two horizontal feet that I put on to site the tank on a flat surface.


Just a quick post this week, 
Oorroo! Geoff.

Saturday, March 17, 2012

Goods shed surrounds

I've enjoyed the scenery work of late. So thought it about time to locate the Goods Shed base in its location. I've built the shed in two parts, sort of. What I mean is that the base is separate from the walls so that the interior can be modelled as well and especially to ease the pain of painting.


So armed with the base of the shed I mixed up some sculptamold to form the base around the shed. I slopped on the mix making sure not to get it in the area of the four corner posts. I built the shed with four posts in the corners exactly the same size, and the rest were 2mm shorter. I did this to take into account my poor cutting skills. I thought  it alot easier to site a building on four posts and mask the shorter posts with groundwork, rather than sanding a bit off this one, then that one...you get the idea.


I marked the location of the four corner posts and then formed the base around them. I pressed the base into the damp sculptamold leaving an impression in it of where all the posts would be located. 


After it had cured it was out with the paint as a base coat, then gravel for the area of unloading, and access road along the side of the line. I used more of the Chucks QLD river sand for this, it has a nice even tone about it and the grains are fairly fine. I normally put down the watered down PVA first then sprinkle the 'gravel over it so that it soaks up the glue. Then if I need to add more gravel then I can put more glue on top of what is already laid and it soaks through just fine.


All this work on gravel had me looking at the ballast on the front module. Time to make some progress here. The gravel is a mix of chucks N scale, ash (that's been ground down in my handy dandy Target $15 mortar and pestle, a little too coarse in its purchased state), and some pale coloured soil that I grabbed from a roadworks site some years ago now. I don't do anything too complex, just add a bit of this and that, however I do normally add a 50/50 mix of ballast and the soil mixed together rather than ballast on its own.  So down with the gravel/soil/ash and flatten it out and move it about with a 1/2 inch paint brush. Wet the lot down with a spray of 'wet' water then glue it down with white glue mix. 


I want to add a bit more into this scene so there is a side story going on at the same time as the scenery, that being detail bits. I don't know about you but I think there would be a fair number of you that have been collecting things 'for that spot on the layout'. You know the old drums, crates, timber, milk cans, brooms, bicycles, vehicles, carts, the list goes on. Anyway I pulled out a fair number the other day and got some undercoat on them so that they were one step closer to being on the layout also. 


That's about it, have a good week, 
Oorroo! Geoff.


Wednesday, February 15, 2012

Evans Gap Loading Bank

The loading bank at Evans Gap has been a little plain for a while, with the intention of 'messing' it up being on the ever growing list of 'jobs to do'. It has been a bit of a distraction from the construction of the Goods Shed which is still in progress. I like being able to switch from one thing to another, it keeps you fresh and enthusiastic I think.


The loading bank has been reinforced with some timber retaining walls, as the ground around Evans Gap is not exactly flat. There's a little bit more to do with the actual gravel drive looking a little too pristine at the moment. 


Anyway thought I should show you just what I've been doing as it's been awhile since posting.


A bit of a plug to for those of you interested in Model Railway Shows, there is one being put together by the New England Club and the Rotary Club of Moree. The show is on Saturday 21st and Sunday 22nd of April, 2012. If you were at the Inverell Show a few years back, then you'll have some idea of what standard the New England Club bring to the General Public. We should be there as well, first show for the year, gonna be a great start to 2012 I think.


Well enough chatter, gotta get back to the Goods Shed! 


Oorroo! Geoff.

Monday, January 9, 2012

G1b Goods Shed pt1

The G1b project has begun. I wanted to add a little detail to the construction of this model as it will be located, front and centre on the Evans' Gap side of the layout. The budget of pioneer lines meant that the adage I've used to describe them as 'just enough to get the job done' , certainly applies here.

I enjoy the look of the detail of O scale board by board construction, and I try to do what's possible for HO. There are plenty of scale lumbers around, but I prefer the Kappler range supplied by Warren at Gwydir Valley Models (link in my suppliers list). I have a Data Sheet plan of this shed and I use them to build over during construction. I've used a simple construction method, floor planking down first, and tensioned together. then on top mounted the joists, then the bearers. Once this had all glued together I gave it a quick stain, with dilute india ink, and a little teak on the underside, then a teak stain on the top.


Next its on to the wall construction, built over the plan also. To keep things moving along I've undercoated the corrugated campbells siding, ready to mount around the building once the walls are in place.
This photo is not of a G1b, but does show the exterior colour that I'm going for. This is the goods shed at Canowindra NSW. I will be modelling the shed with the doors open so that a glimpse of the interior is possible.
OK now this shot is of interior of the Manilla Goods shed. The interior bracing, and door detail is what I'm after. Been a while since the 'maid' worked here I think.

I took these photos through holes in the iron, or through smashed windows in the end office. If any of you venture to this location, please don't make the same mistake I did and wear a jacket that cobblers pegs attach to in their thousands! (yep! no exaggeration either!) Check out the subtle weathering of the timber colour onto the iron, just how can we do this in HO?
So here's the plan and one end on it. I just had an idea for the second side. Rather than building the other side on top of the existing one, which may well damage the first one, especially when I separate both; I've made a colour copy of the reverse of the constructed side. Now I'll try and build a second side on the copy.
Yep, came up ok, so on to the front and rear walls. I think that will have to do for now,
Ooroo! Geoff.